Starwind Pro docs
Installation
This guide walks you through setting up Starwind Pro so you can start installing blocks in minutes.
Prerequisites
Before you begin, make sure you have:
- An Astro 5 or newer project
- Node.js 22.12 or newer
- A Starwind Pro license for premium blocks, available from the pricing page
Info
Free blocks work without a license. You only need a Pro license for premium blocks.
Step 1: Initialize Starwind Pro
Choose the setup path that matches your project. Each path ends at Step 2: Get Your License Key.
CLI Setup (Recommended)
For a project that does not have Starwind UI V3, run init --pro from the project root:
pnpm dlx starwind@latest init --pronpx starwind@latest init --proyarn dlx starwind@latest init --proThis initializes Starwind UI V3 and configures Pro authorization.
If Starwind UI V3 is already initialized, add Pro authorization with setup --pro:
pnpm dlx starwind@latest setup --proBoth commands create .env.local when it is missing and add it to .gitignore. Put your license key in that file after Step 2.
Free @starwind-pro/* blocks work with an ordinary Starwind UI V3 setup.
Once complete, skip to Step 2.
Manual Setup
First complete the Starwind UI Astro manual setup. It covers the V3 adapter, Tailwind CSS, path alias, shared stylesheet, and theme initialization.
Then add Pro authorization to your existing starwind.config.json:
{ "pro": { "registry": { "headers": { "Authorization": "Bearer ${STARWIND_LICENSE_KEY}" } } }}Keep the other V3 config fields from the base setup. The CLI uses https://pro.starwind.dev/r/{name} as the default Pro registry URL.
Create .env.local in the project root:
STARWIND_LICENSE_KEY=your_starwind_pro_license_keyReplace the example value with the key from Step 2. Add .env.local to .gitignore before you install a premium block.
Caution
Keep .env.local out of version control. The CLI sends the license key in the Authorization header when it requests a premium block.
Step 2: Get Your License Key
There are a few ways to retrieve your Starwind Pro license key. Once retrieved, add it to your .env.local file.
Fetch Your License Key Here
If you’re signed in with Starwind Pro access, you can fetch your license key directly:
From the Account Dashboard
- Sign in to your account and go to pro.starwind.dev/account/
- Scroll down to the “Getting Started with Starwind Pro” section
- Click the “Get License Key” button
- Your license key will appear in the code block below
From the Polar Dashboard
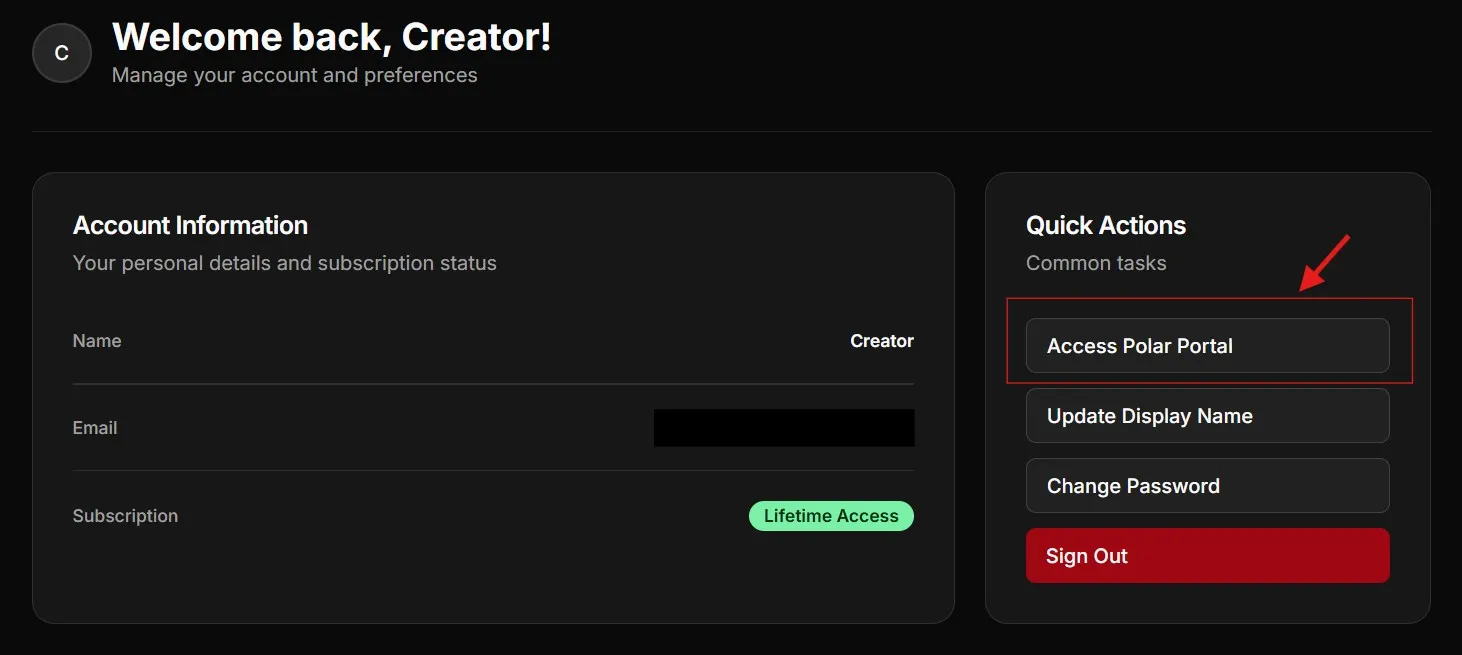
- Go to your account page at pro.starwind.dev/account/
- Click “Access Polar Portal” in the Quick Actions card
- Find your license key in the Polar customer portal
Tip
Your license key is tied to your account. Keep it secure and don’t share it publicly.
Step 3: Install Blocks
You’re all set. Browse the component library and install any block with the CLI:
pnpm dlx starwind@latest add @starwind-pro/hero-01npx starwind@latest add @starwind-pro/hero-01yarn dlx starwind@latest add @starwind-pro/hero-01Info
You can find the exact install command on each block’s demo page. Click the copy button and paste it into your terminal.
Next Steps
- Browse the component library to see all available blocks
- Migrating a V2 project? Read the V3 Migration guide
- Having issues? Check the Troubleshooting page
- Join the community for support and updates